How to Record Product Demos from Your Browser
Learn how to record browser-based product demos with narration, clear pacing, and a simple WebM export workflow.
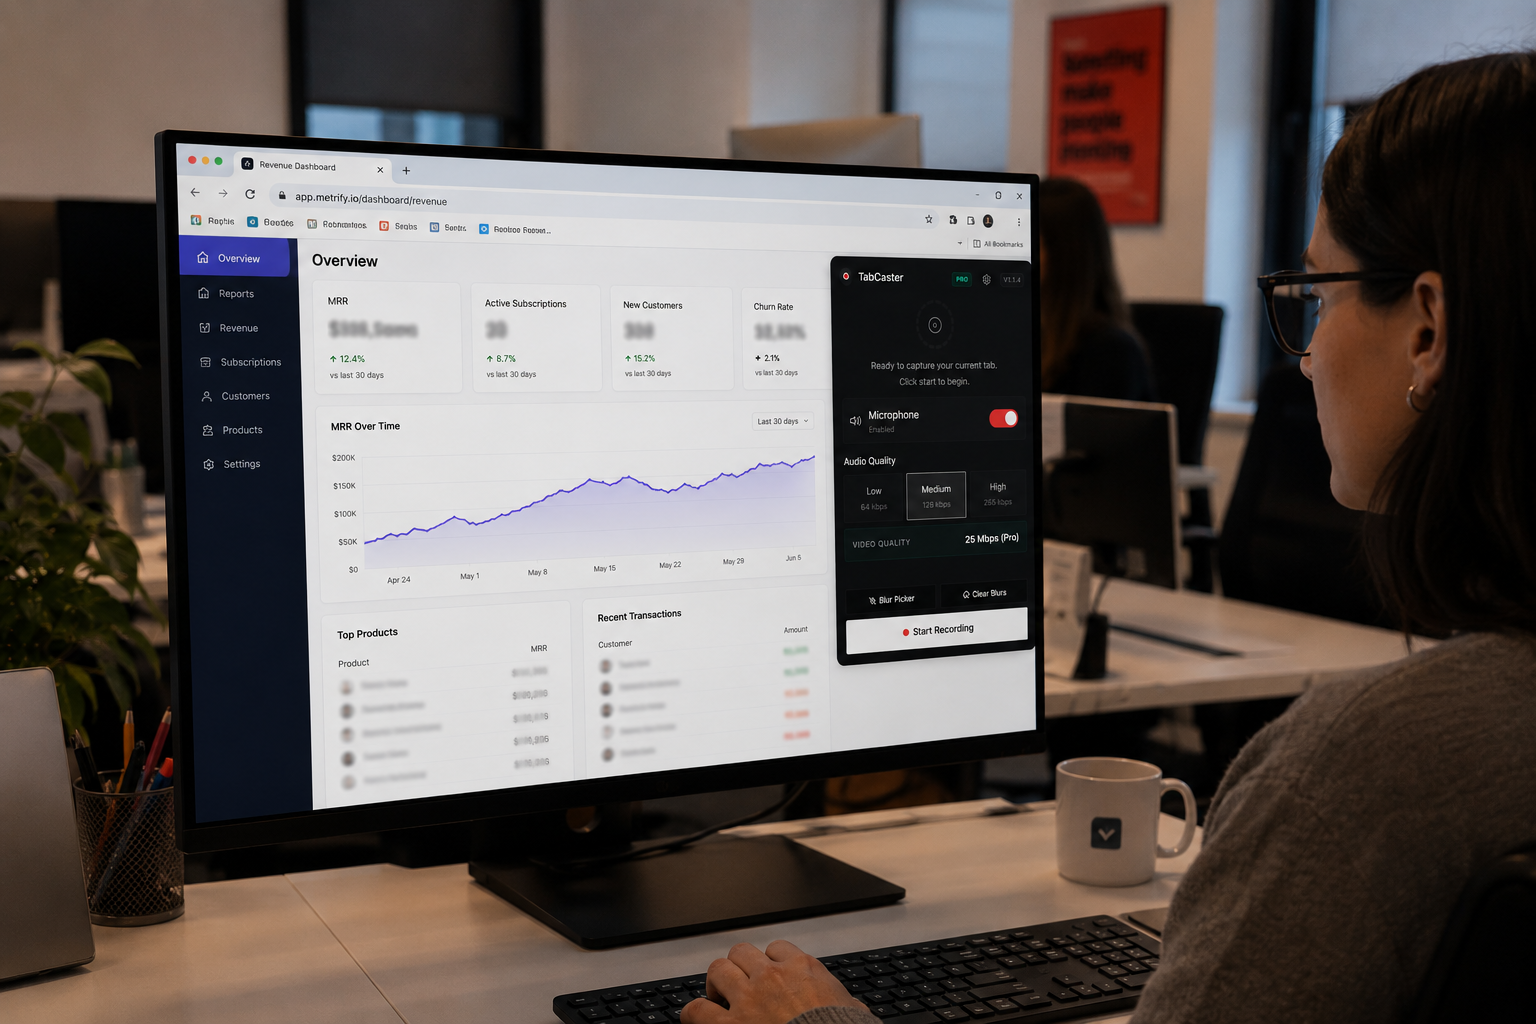
To record a product demo from your browser, open the tab you want to capture, click the TabCaster extension icon, enable microphone narration, and follow your outline while recording. TabCaster saves the demo as a WebM file to your Downloads folder — ready to share in under a minute, with no upload step and no account required.
Browser-based demos are the fastest way to show how a web product works. Because the recording happens directly in Chrome using the browser’s native MediaRecorder API, there is no desktop app to install and no server-side processing — the full workflow from setup to shareable file takes less than two minutes.
Why Planning Matters More Than Production Quality
Before you touch the record button, spend a few minutes thinking about what you actually want to show. It sounds obvious, but the most common mistake in product demos is starting the recording without a clear structure. The result is a wandering tour of every button and menu, which teaches the viewer nothing and bores them within the first thirty seconds.
Write a short outline with three elements. First, the problem your viewer cares about. Second, the specific workflow or feature you are going to demonstrate. Third, the result they should remember. This outline does not need to be formal — a few bullet points scribbled in a notes app is fine. The point is to give your recording a beginning, middle, and end.
For example, if you are recording a demo of a project management tool’s timeline view, your outline might be: “Teams struggle to see project dependencies at a glance. I’ll show how to create a timeline, link tasks with dependencies, and identify scheduling conflicts. The takeaway is that they can spot bottlenecks in seconds instead of manually comparing due dates.”
Setting Up for a Clean Recording
Once you know what you are going to show, prepare your browser. Close tabs you do not need — stray notifications or unrelated pages can pull the viewer’s attention away from your demo. If your product has a settings page or admin panel that you do not plan to show, navigate away from it before you start.
Consider the zoom level of your page. If you are recording on a high-resolution display, the text and UI elements in your product might appear small in the final video. Zooming the page to 125% or even 150% can make a significant difference in readability, especially if viewers are watching on smaller screens or mobile devices.
If the account you are using for the demo contains real data — customer names, revenue figures, email addresses — you should obscure those details before recording. TabCaster Pro can automatically blur common sensitive patterns before capture, so private information is less likely to appear in the video file.
Recording the Demo
With your browser prepped and your outline in hand, open TabCaster from the toolbar. Enable microphone audio so you can narrate the demo as you go. Narration is what turns a screen recording from a passive video into an engaging walkthrough. Without it, viewers have to guess why you clicked that button or what that notification means.
Start recording and follow your outline. Move at a deliberate pace — slightly slower than your natural browsing speed. Click on things intentionally, give the page a moment to load between navigation steps, and pause briefly before introducing a new concept. These small adjustments make the recording feel polished without requiring any editing.
When you speak, focus on the “why” rather than the “what.” Your viewers can see what you are clicking on. What they need from your narration is the context: why this feature exists, why this workflow is faster than the alternative, why this particular setting matters.
Keeping It Short and Focused
The ideal product demo is between two and five minutes. Shorter than that, and you probably did not have time to set up the problem properly. Longer than that, and most viewers will stop watching. If you have more to show, break it into separate recordings — one for onboarding, one for the core workflow, one for advanced settings.
Each recording should feel complete on its own. A viewer who watches just one of your demos should walk away understanding the specific value you showed them, without needing to watch the other videos for context.
After the Recording
TabCaster saves your demo as a WebM file in your Downloads folder. For most internal use cases — sharing with colleagues, embedding in a sales deck, adding to a help center — the WebM file works perfectly. Modern browsers play it natively, and the file size is usually small enough to share directly.
If you need to publish the demo on YouTube, a marketing page, or a platform that requires MP4, convert the WebM file using a tool like FFmpeg, HandBrake, or an online converter. Keep the original WebM file as your archive — it is the highest-quality version and you can always convert it again later.
The most important thing is to actually hit record. An imperfect demo that exists is infinitely more useful than a perfect one that you never got around to making.