How to Record a Browser Tab in Chrome
A practical guide to recording a Chrome browser tab with audio, saving a WebM file, and keeping the workflow simple.
To record a browser tab in Chrome, install the TabCaster extension from the Chrome Web Store, click the toolbar icon on the tab you want to capture, enable microphone audio if needed, and press record. Chrome will ask you to confirm which tab to share, then TabCaster captures it locally and saves a WebM file directly to your Downloads folder — no account, no cloud upload, and no additional software required.
Most screen recorders require a desktop app, a cloud account, or a complicated permission flow just to capture what is already on your screen. TabCaster removes all of that: the entire recording workflow takes under 90 seconds from install to saved file.
What You Need Before You Start
Getting set up takes about a minute. You will need Google Chrome or any Chromium-based browser like Brave, Edge, or Opera. Head to the Chrome Web Store, search for TabCaster, and install the extension. Once installed, pin it to your toolbar so you can access it with a single click.
If you plan to narrate your recording, make sure your microphone is connected and working. Chrome will ask for microphone permissions the first time you enable audio capture, so keep an eye out for the browser prompt.
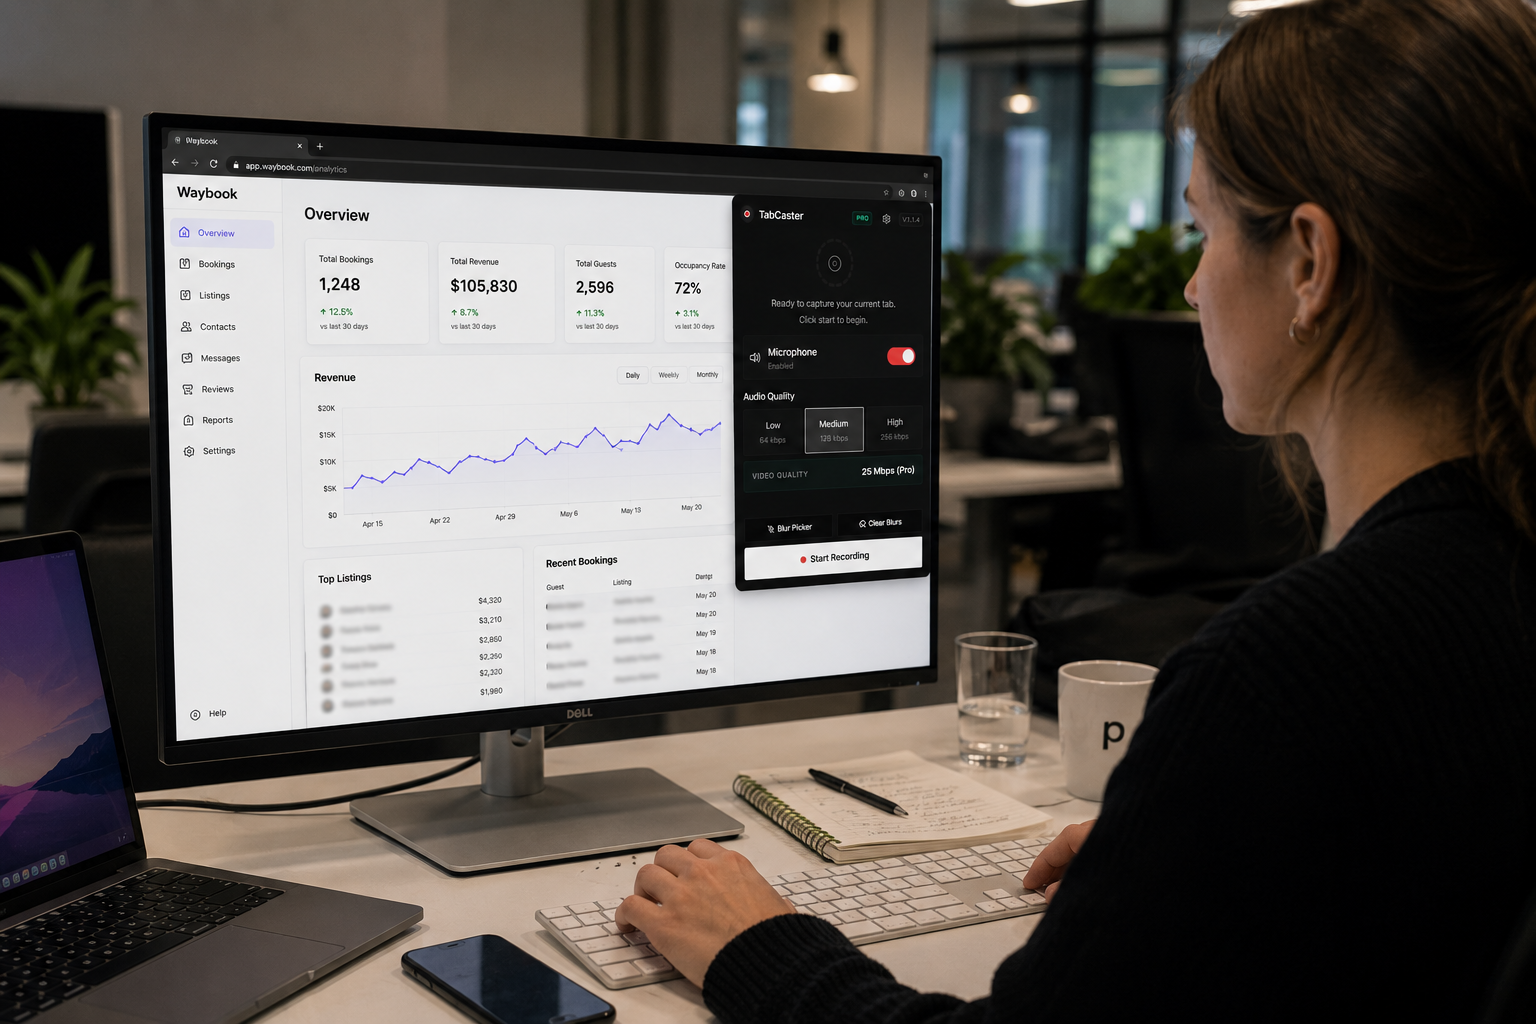
Recording Your First Tab
Open the browser tab you want to capture and click the TabCaster icon in your toolbar. You will see a simple panel with your recording options. Choose whether to include microphone audio, select your preferred quality settings, and hit the record button.
Chrome will ask you to confirm which tab you want to share. Select the correct one and your recording begins immediately. Navigate through the page, click through workflows, scroll through dashboards — everything happening in that tab is being captured.
When you are finished, click the stop button. TabCaster processes the recording locally in your browser and saves it as a WebM file directly to your Downloads folder. There is no waiting for uploads, no cloud processing, and no file size limits imposed by a third-party service.
Tips for Cleaner Recordings
The difference between a good recording and a confusing one usually comes down to preparation. Before you hit record, close any tabs you do not need — stray notification sounds or visual clutter can be distracting. If the content you are recording has small text, zoom the page to 125% or 150% so viewers can read it comfortably.
It also helps to rehearse the first few seconds. Know what you are going to click on first, what you are going to say, and where you are going to navigate. A recording that starts with purpose feels much more professional than one that begins with “okay, let me find the right page.”
For product demos or support videos, keep each recording focused on a single task or workflow. A three-minute video that covers one thing clearly is far more useful than a ten-minute video that tries to cover everything.
Handling Sensitive Information
If you are recording a page that contains customer data, email addresses, API keys, or billing information, you should not let those details appear in the final video. TabCaster Pro can automatically blur common sensitive patterns like emails, tokens, card numbers, IP addresses, and password fields before you start recording. This way, sensitive content is hidden in the recording itself, not just redacted after the fact.
Why WebM?
TabCaster saves recordings in the WebM format because it works natively with browser media APIs and plays directly in most modern browsers. For internal sharing, attaching to tickets, or embedding in documentation, WebM works perfectly. If you eventually need to publish the video on a platform that requires MP4, you can convert the file using any standard video tool.